
Somewhere at the beginning of 2014, I learned about a new craft from the embarcadero, which still appears and can write under mobile platforms. And now, just recently I downloaded it. At the beginning, the impressions were positive, with the exception of the unusual arrangement of objects. I sat, so I slowly ported one project to a mobile platform. I noticed that in heavy cycles this devil is hung up. Applications weigh very, very much. Nevertheless, he saved the project and stopped. I think I need to learn more. Still, this is not the good old Delphi-7 from Borland ...
And so, I decided to write a couple of articles while I’m studying this monster myself. I do not pretend that my options are solely correct and admit criticism.
As usual, we start with the simplest and most useless. Let's make a greeting. Easy, primitive, useless. As a bonus to this, I’ll show you how to optimize applications for different screens quite well for the first time.
Let's get started. We connect the device to the computer in debug mode. If the computer "does not see well" your Chinese, I recommend looking here: You can’t see the phone/tablet in debugging mode. Solution.
I highly advise against emulating a device. It loads the computer very much and in places it is very hard even with a good PC.
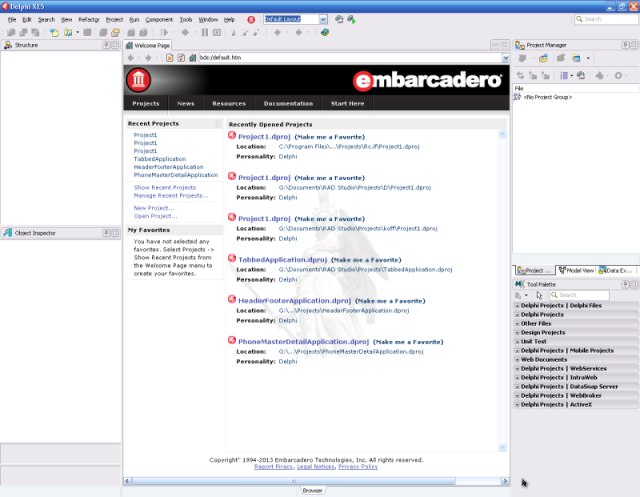
We launch weapons of mass destruction android devices delphi.
A terribly incomprehensible window opens up before our eyes. Now let's figure out what's what.
We are creating a new mobile project. You’ll have time to figure out what’s in this window.
How to create such a project? In, look.

Next, another window will open. It will be a choice of template. Now we need an empty one. (Blank Application)

Now, the window in which we will work has opened. Let's take a closer look at it:

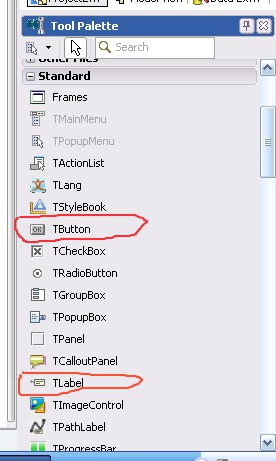
- This is where the components are now.Very unusual location.But there is a very nice search on the names of the components. It is also pleasant in that you can partially remember the name of the component. Let's just say the end. Write it, and it will be easy for you to find it.
2. Directly, the form. its appearance (and the size of the form itself with regards to the size of the screen. If you drop components, they will be located completely differently on different "forms"), you can select the drop-down menu marked in figure 6 .
3. Object inspector. His place is holy. They did not move him anywhere, and did not even modify them. It changes the properties for various objects.
4. The project tree. Its location is also not affected by embarkadera. In it you can see what components are present in our project. Convenient thing.
5. The project manager. I have not yet fully entered its essence. But as I understand it, here you can view, select all the devices connected to the computer, as well as the emulators of these devices themselves. As I understand it, you can look at what files the project consists of.
6. As I said - this is a traveling menu to modify the form.
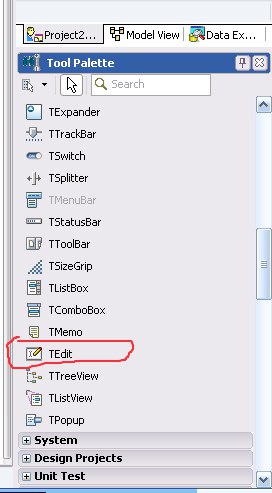
In. Around figured out. This means that we deploy the “Standard” spoiler in the components, and pull out TButton and TLabel from there. You can pull them out as you hold down the left mouse button, or simply by double-clicking on it. We go down below and repeat the same with TEdit.
I'm sure you're in a mess. Here, like mine:
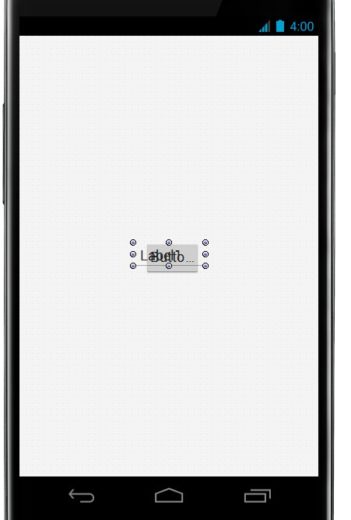
I spread the components in the form more or less. By the way, they can be "pulled" in all directions to get the optimal size. But, for sure, I want it to be exactly in the center, on the hairdryer. Let's do it exactly.

So what we're doing. Let's push the right button on the component, open "Position" and clas on "Align..."
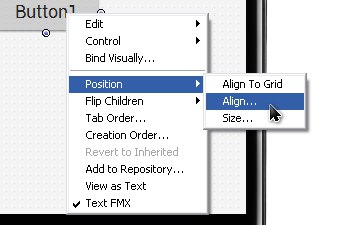
There's a window open. We celebrate the center horizontally and rejoice.

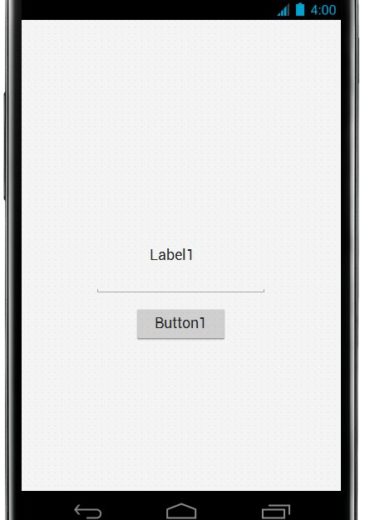
Repeat with all components. It turns out something like this:
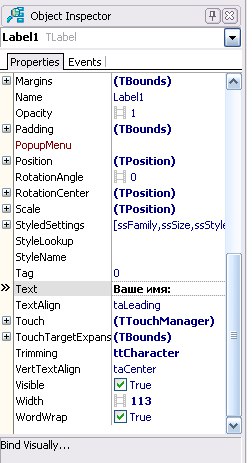
Now, click on the Tlable component once with the left button. We go to the object inspector and change the "Text" property. From "label1" to "Your name:."
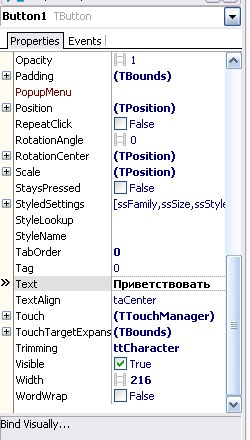
Repeat with Button1. Let "Text" be equal to "Welcome."
That's it. The design is over. Now, let's move on to some of the code. Push the button component twice. A modest code editor with an OnClick feature already generated will open, which works when you click on a button in an already running application.
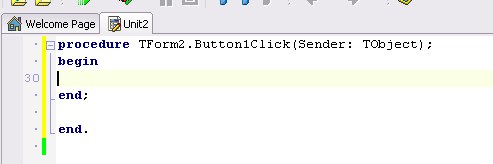
Let's put something like this in there:

So, we take it apart.
showmessage - function to open a window with a message. Everything in brackets: “()” - and it will show.
Edit1.Text is something like a variable. It is outside the quotation marks, this is considered a code. Instead of Edit1.Text, the message will show what the person entered in the field.
+ - It’s like adding up a value and eating it in quotation marks into a single message.
'welcome!' - and there is a value in quotation marks. Line ending.
; - A mandatory symbol that indicates the end of an action. It is put in almost all the lines at the end.
Now, let's go back to our form and fix the positions of the elements for the normal display of the application on all (or almost all) screens. You can return to the form by clicking “Design” at the bottom of the page.
![]()
We click on a component once , and in the object inspector we expand the list of "anchors" - anchors.
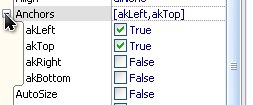
These are the very mounts for objects. All of them do not need to be included at all. For at the same time akTop and akBottom (top and bottom), the components on small screens can be flattened to a pixel strip not visible to the human eye. Therefore, we leave on only akLeft, akRight, and one of the two - akTop, or akBottom. (I prefer akTop to be turned off and akBottom to be on)

We repeat this case with all objects.
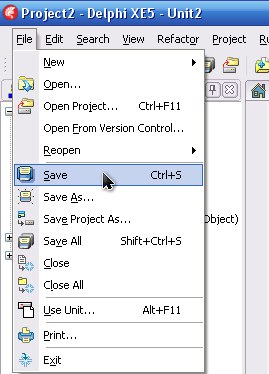
Now, keep our project somewhere.
Well, that’s it. It remains only to launch this huge complex. We connect the device in debug mode (If you have not already connected).
We expand such a tree in the project manager, activate the connected device by double-clicking the left mouse button. It should become bold.

Next, we press F9 and wait for the complete assembly of the project and its installation on the device. The application should launch on the device itself.
After starting, write our name in the field and click on the button.

Continuation: here